


The Best Way to Tune Up Your Bike
- By Matt Pacocha
- Published: 2 jun 2022
- Last Updated: 2 jun 2022

Springtime: The days are getting longer, it’s getting warmer, and it's the busiest time of year for your local bike shops. You can skip the next available appointment and save a bunch of money by tuning up your bike yourself. Let our step-by-step Tune Up Guide show you how!
How to tell if your bike needs a tune up
All bikes benefit from a tune up, even brand new ones. There’s a break-in period for new bikes where things can settle out of alignment or jiggle loose. The components and parts on older bikes wear down and stretch out. And even bikes that are shelved in pristine condition can rust or seize up if they are forgotten in the garage for long periods of time.
Here are some obvious signs that your bike is in need of a quick spring cleaning:
- Squeaking
- Gears aren’t shifting smoothly or are skipping
- Breaks feel loose or it’s difficult to come to a stop
- Visible caked-on gunk
- Rust
How often should you tune up your bike?
Every 6 months to 1 year depending upon how much it gets ridden.
How long does it take to tune up a bike?
About 1 to 1.5 hours
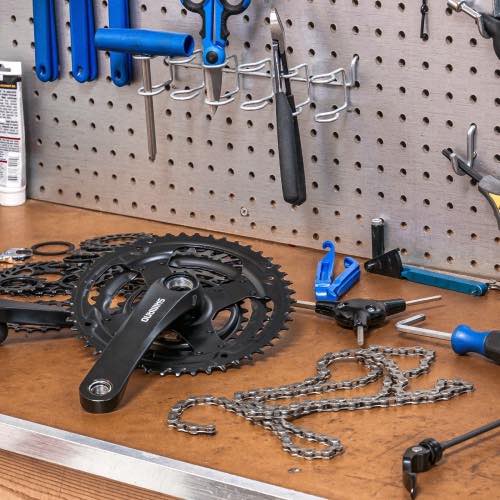
Things you need to tune up a bike
- Bike pump
- Rags
- Chain Lube
- Multi-Tool or Allen Wrench Set
- Adjustable Wrench
- Garden Hose
- Dish Soap
- Drivetrain Degreaser
- Old Toothbrush or Bike Cleaning Brush Set
- Chain Checker Tool
- Spoke Wrench
Simple Steps:
STEP ONE: Clean & Degrease
A clean bike is a fast bike. Wash dirt, mud, and accumulated gunk off of your frame with low-pressure water from a hose. Bikes are engineered to function when wet, but pressurized water can force dirt and dust into the bearings. It can also remove the grease that keeps your bike rolling and shifting smoothly.
Wash your bike from the top down and save your drivetrain (cranks, cassette, and chain) for the very last. Dish soap is a great soap option as it is non-toxic, gentle on frames and components, but strong enough to break down caked-on residue. A soft-bristled brush or old toothbrush works great to clean off the stubborn stuff.
Once the frame is clean, move on to the drivetrain. This is the most important area on your bike to clean correctly because this is where most of the moving parts reside. A dirty drivetrain wears down your chain and cassette and forces you to work harder, so any extra cleaning effort and attention that goes into this area goes a long way.
Start by using a drivetrain degreaser (like Pedro’s Pig Juice), let it sit for 10-15 minutes then take a stiff-bristled brush, or toothbrush, and scrub the cassette and chain. Spray the drivetrain with water to wash away the degreaser and grime, and then spin the cranks a few times to force out any water from the chain.
Pro Tip: Take your cassette off and give it a good cleaning once a year.
STEP TWO: Safety Check
Arguably the most important step of a tune up, a quick safety check can help you keep track of wear and tear and prevent major problems down the road.
Fork & Frame
Regardless of what your bike is made of (carbon, titanium, aluminum, or steel), cracks can form in high-stress areas. Now that your bike is clean, start your safety check by inspecting the frame of your bike from the bottom up. Check out the fork legs, the junction of the head tube, the top tube, the downtube, and the area around the bottom bracket shell and chainstays. These are all key locations where cracks can form. Look for hairline cracks in the handlebar, especially where it meets the stem and on the seatpost where it meets the seatpost collar as these are the most common high-stress areas. Finally, check the underside of the saddle to make sure the saddle rails aren’t bent or cracked.
Wheels & Tires
Tires: All tires deflate over the course of time, and flats are just a part of cycling. The best way to pre-empt a flat and take care of your tires is to keep them aired up and to check for wear, cuts, and tears in the sidewalls regularly. Most tires have a recommended PSI range printed on the sidewall, close to where it touches the rim. In general, you’ll want to inflate road bike tires between 100-120 PSI, commuter tires between 60-80 PSI, and mountain bike tires between 35-60 PSI. Be sure to use a bike pump with a built-in pressure gauge or digital pressure gauge to get an accurate PSI reading. If you have tubeless tires, refresh your sealant, as it can dry up if your bike has been sitting for long periods of time.
Pro Tip: There will be times when you won’t have a pressure gauge handy. Plan ahead for this by using your hands and fingers to tangibly feel the firmness of your tire when it is aired up to the preferred PSI. This will give you a good idea of what to shoot for the next time you have to change a flat on the trail or out on the road.
Wheels: Wheels are comprised of 4 basic components: a hub in the middle, a rim on the outside, spokes that hold the hub up, and spoke nipples that tighten or loosen the spokes. To check the health of your wheels:
- Check for any loose spokes
- Hold each wheel by the rim and attempt to move them side-to-side to check for loose hubs. There should not be any lateral play in the hubs.
- Inspect the rim for any dents or cracks
- Spin the wheel to look for wobbling
Pro Tip: Tighten loose spokes and replace broken spokes immediately. Your entire wheel is held together by a balance in spoke tension so riding on a wheel that has loose or missing spokes will lead to a wheel that needs to be rebuilt.
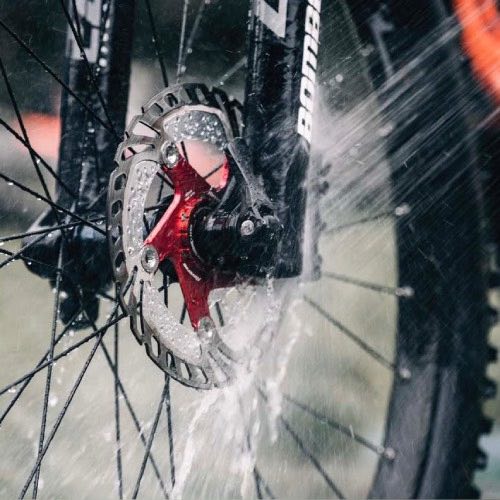
Brakes: Checking your brakes is super easy. If you can squeeze your brake levers all the way to the handlebars, the brake is either too loose or the brake pads are worn out.
Brake pads have wear indicators, so it’s easy to see if they have any life left in them. If you notice uneven wearing on the pads, and there is plenty of rubber still left on them, you can use a course file to square them off. Once you’ve squared them off and cleaned any dirt and dust from the brake calipers, readjust the pads so that they contact the middle of the rim, not above or below.
Pro Tip: If your bike has cable-actuated brakes, make sure the brake cables aren’t frayed. If your bike is equipped with hydraulic brakes and you have to pump the brakes several times before they properly engage, you’ll need to perform a brake bleed to remove air from the system.
Cables & Housing
Shifting efficiency tends to degrade over time, so you may not notice that your cables are worn out until you’re left on a ride without the ability to shift. Gear cables can get kinked and frayed, so a quick look at the appearance of your cables and housing, as well as how smoothly your bike is shifting after you’ve cleaned it can go a long way.
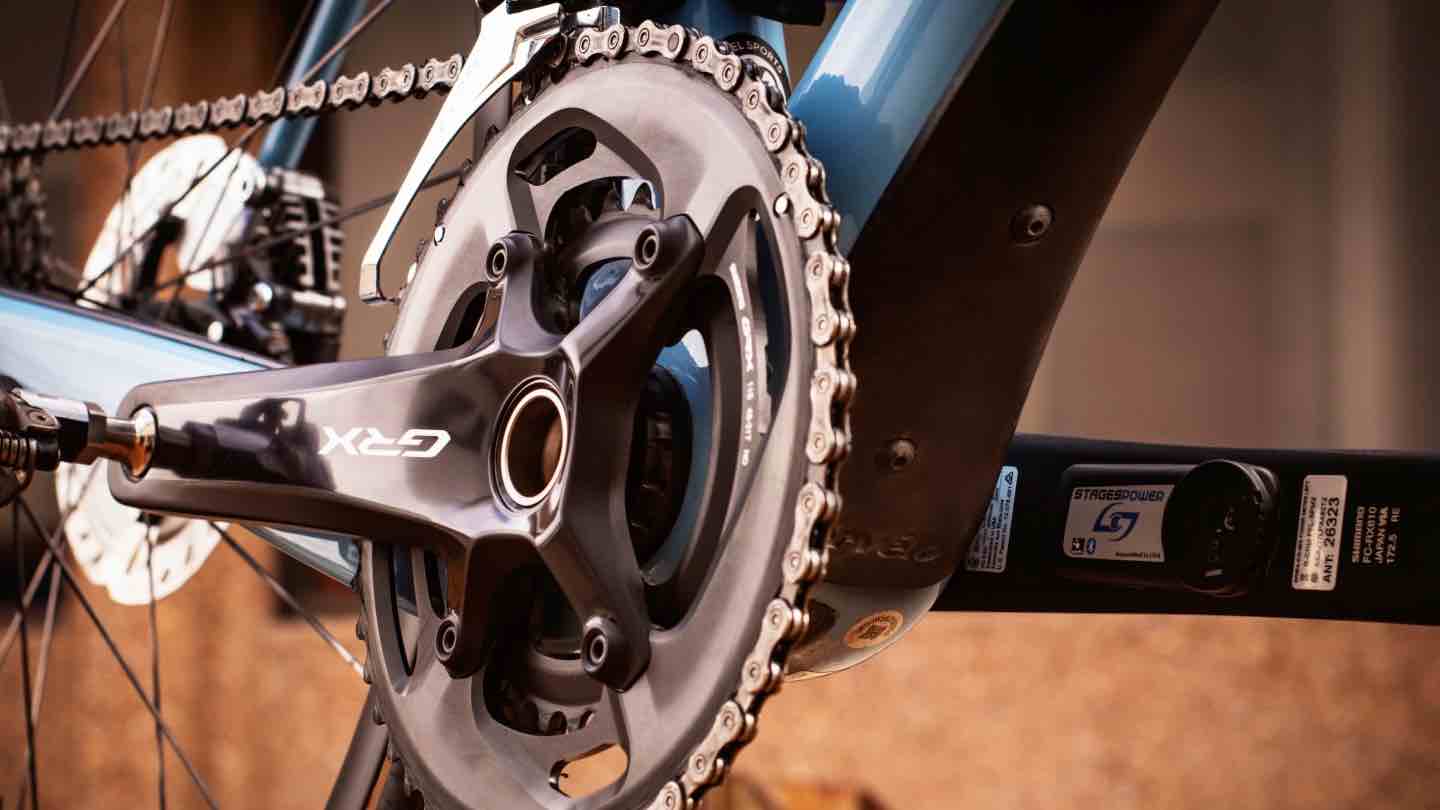
Drivetrain: Chain, Cranks & Cassette
Clean & lube your chain.
Now that your drivetrain is cleaned and degreased, it’s time to lube it up! Start by wiping your chain down with a rag. Rotate the crank until the joining pin is at the bottom of the loop. This serves as a reference point for where you started and should stop. Then, carefully place one drop of lube on each roller. Distribute the lube slowly and evenly and then give the crank a few spins. Let the lube settle into the chain for up to an hour and then wipe any excess off with a rag. Avoid heavily slathering the entire chain in lube, as too much lube will collect extra dirt, slow you down, and wear out your drivetrain.
Measure/check your chain.
Keeping your chain clean and well lubed is essential, but it’s also important to measure your chain. Chain “stretch” is actually worn pins and rollers. A simple chain checker can tell you when it’s time to replace your chain before it breaks and ruins your ride or cassette.
Consider replacing your chain.
Bumpy or difficult shifting can be a sign that you need to replace your cables and housing, but it could also mean that your chain is stretched. As a general rule of thumb, you should replace your chain every 3,000 km (1,864 miles) to ensure that your drivetrain is functioning properly and to prevent wear and tear on more expensive parts like your cassette and chainrings. Chains and cassettes break-in together. So if your chain is more than 50% through its lifespan, you might consider replacing the chain and cassette at the same time to prevent shifting issues.
Pro Tip: If you want to go faster and maximize your pedaling energy, keep your chain clean and lubed. Research conducted by the Friction Facts test lab showed that failing to clean and lube a bike chain after a muddy ride can cost you precious watts (12 watts for a rider putting out 250 watts, ~5 percent of his or her power).

STEP THREE: Power Meters, Apps & Accessories
Don’t forget to power up and update your accessories before you head off on your first ride of the season! If you have a power meter, you’ll want to pop in a fresh battery, check for firmware updates and perform a quick zero-reset. Be sure to give your GPS bike computer/head unit, sensors (radar, lights, etc.), and shifting batteries (eTap, di2) a complete charge as well. And last, but not least, download or update your favorite on your phone.


